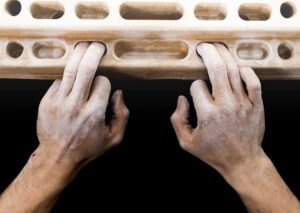
Most of today’s rock climbers start in an indoor climbing gym, pinching plastic holds and scaling wooden walls on top rope. Even if you cut your teeth on real rock, the first time you roped up was probably with a top rope belay to safeguard against a fall.
Top rope is all well and good, and it certainly has its place in the climbing world.
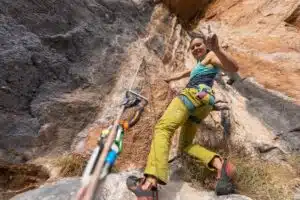
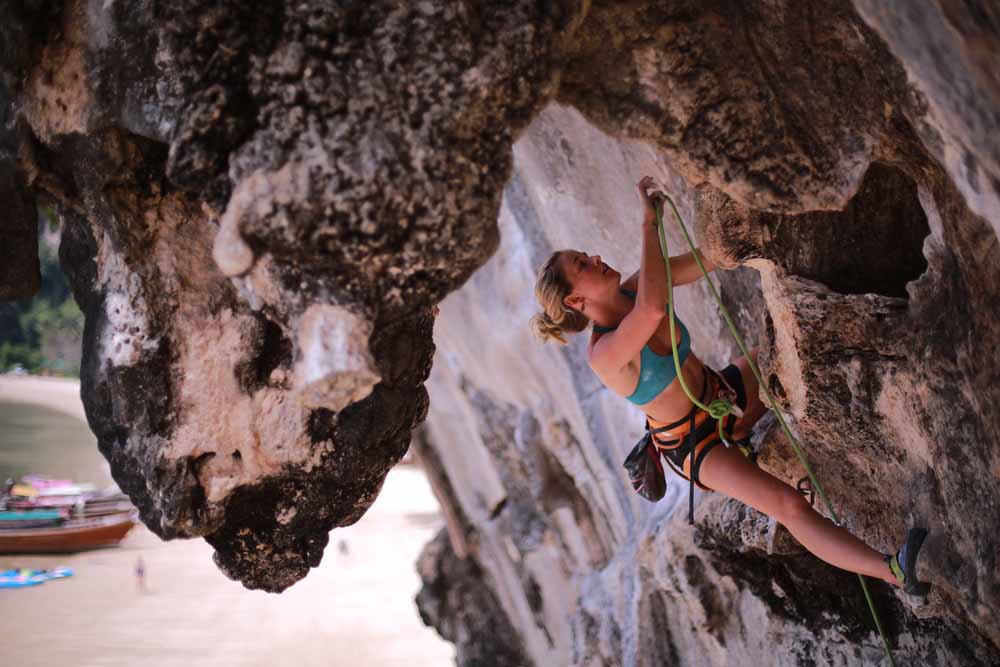
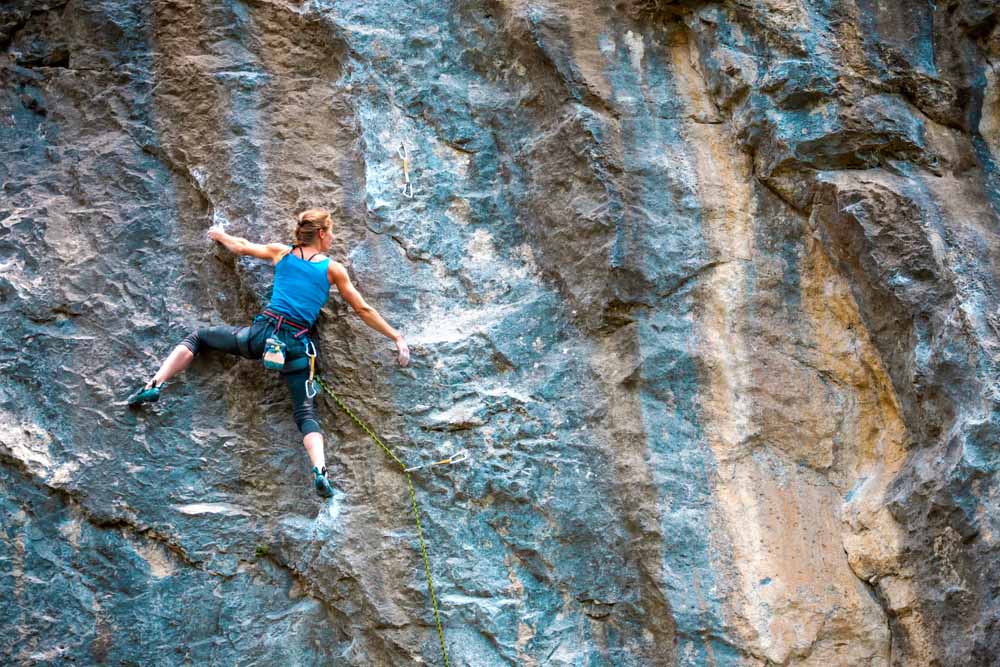
But lead climbing—clipping or placing protection as you ascend, instead of having an anchor pre-built above you—is what rock climbing is all about.
Lead climbing is slightly more risky, and there’s a little more to manage (for both the climber and belayer). But it’s infinitely more fulfilling. When leading, you’re truly climbing a route entirely under your own power. More importantly, once you learn how to lead climb sport routes, you’ll open the door to trad climbing, multi-pitch climbing, ice climbing, and many other fantastic disciplines! So let’s dive in.
NOTE: Lead climbing, and rock climbing in general, is a risky and technical activity with the potential for serious injury or death if practiced improperly. Reading articles online is an excellent supplementary tool, but it’s no substitute for real-world training. Find a guide, climbing school, or local rock gym to help you learn the basics hands-on before you begin leading on your own.
The Basics: What is Lead Climbing vs. Top Roping?
In top rope climbing, the climber is protected by a fixed anchor point established at the top of the climb, with one end of the rope attached to the climber and the other attached to the belayer, running up to the anchor and down on each side.
If your anchor is constructed properly, top roping is usually safer than lead climbing. But it’s also more limiting. You must access the top of a route in advance to set up an anchor and place the rope—which isn’t always possible for a variety of reasons. With overhanging or traverse routes, it’s also difficult to prevent climbers from taking a massive lateral swing if they fall. These swings can be dangerous and also make it hard to get back on the wall and continue the climb.
Lead climbing allows climbers to scale a rock face from the ground-up, without building an anchor at the top and placing the rope in advance.
In the case of leading sport climbs—which we’ll be discussing in this article—the only things you need to have in advance are bolts in the wall and fixed anchors at the top. These are usually either rings, chains, or permanent quickdraws. In the case of trad climbing, another form of leading, you’ll be placing your own protection.
NOTE: Ascending a route completely under your own power via top rope is questionable, as there’s usually an upward rope pull. So in order to earn a redpoint (a true “ascent” of a route) you must lead the climb. This is another reason why learning how to lead climb is so important!
How Lead Climbing Works
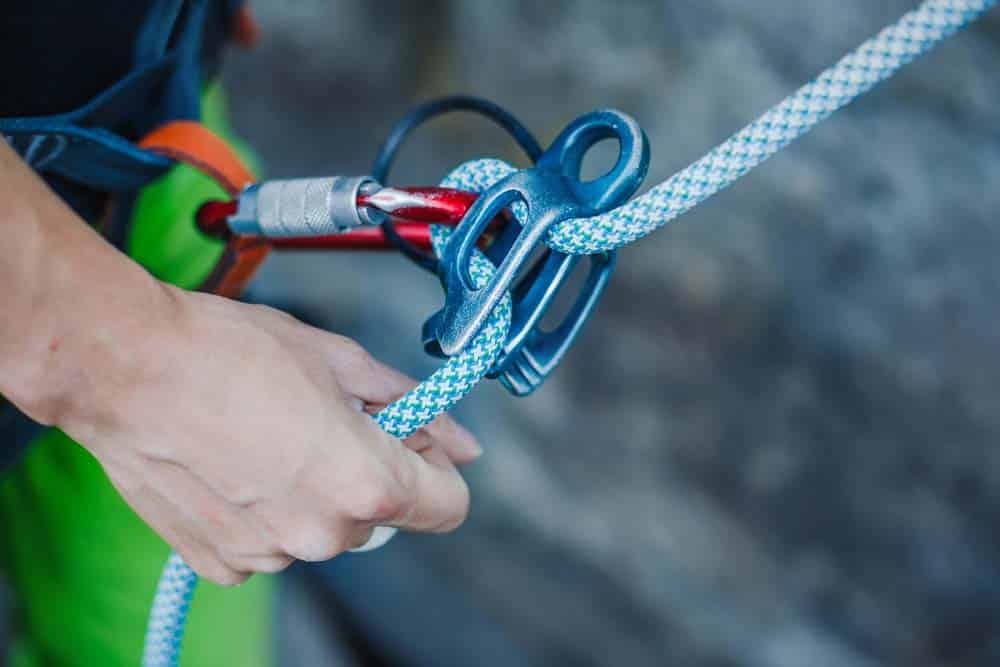
A lead climber begins at the bottom of a route, with one end of the rope tied to their harness. A portion of slack is played out from the climber’s tie-in point, and then the belayer attaches themself to the rope using a belay device, either a tube-style manual device like an ATC or a mechanically-assisted device like a GriGri.
Once the belayer and climber are both attached to the rope and ready, the climber begins ascending the wall, with the belayer giving slack (instead of taking it) as the climber moves upward.
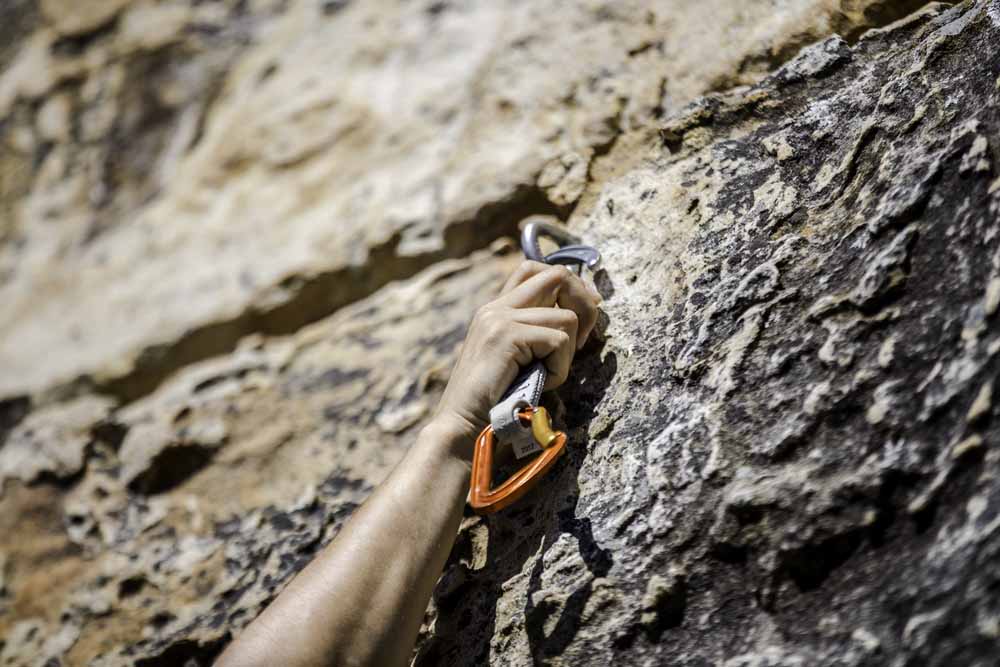
As the climber reaches fixed bolts in the wall, they take quickdraws (two carabiners connected by a dogbone of webbing) from their harness. They attach one end of the quickdraw to the bolt and clip their rope through the other before climbing higher. Each bolt serves as a sort of “safety point,” providing a place for the rope to catch the climber if they fall.
Once the climber reaches the top of a route, they attach themselves to the anchor. This is done either by clipping the rope in (in the case of permanent quickdraws) or via a process called “changing over”.
This involves attaching oneself to the anchor, untying one’s tie-in knot, threading the rope through the anchor’s rings, and retying. The climber is then lowered back down or rappels.
Fall Factor
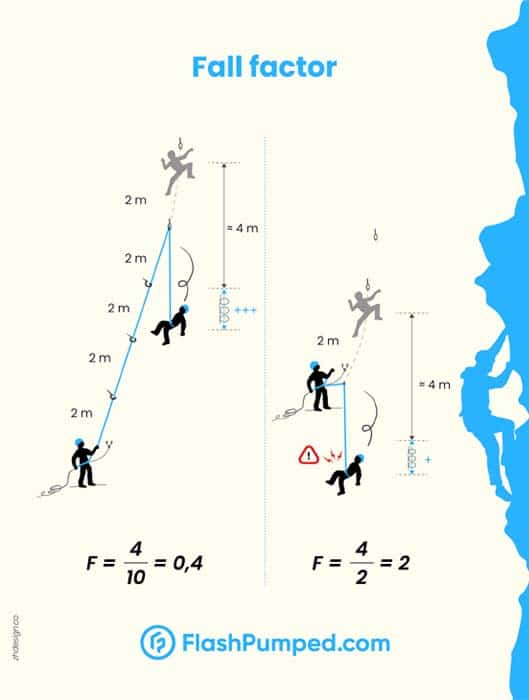
If a climber falls at any point while leading, they will fall double the length to their last clipped bolt. However, equidistant falls aren’t always equally dangerous.
That’s because of a principle called fall factor. The fall factor is the ratio of the height a climber falls before the rope catches (and begins to stretch) divided by the total rope length available to absorb the energy of the fall. Fall factor determines the total violence of force enacted upon your gear. The higher the fall factor, the more aggressive the fall.
For example, in both Scenarios A) and B) you are 10 feet from your last bolt. The difference is…
- A) You are 20 feet off the ground.
- B) You are 50 feet off the ground. (With much more total rope length to absorb your fall.)
Scenario A presents a factor 2 fall. Scenario B presents a factor fall of merely 0.2.
Scenario B is a much safer fall, while Scenario A is extremely dangerous (and essentially a ground fall).
Fixed bolts, quickdraws and ropes are designed to absorb magnitudes of force greater than those enacted upon them in a common climbing scenario. You could hang a car off of most bolts. But principles like fall factor are important to keep in mind as you lead climb. They become invaluable if you branch into more technical disciplines like trad climbing.
Placing Quickdraws and Clipping Correctly
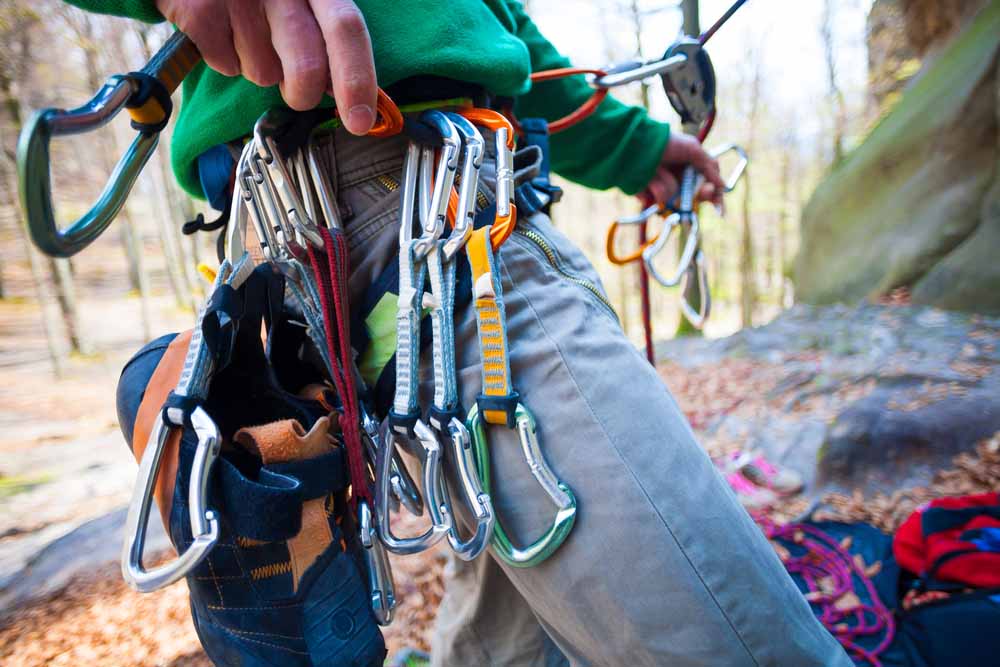
Learning how to use quickdraws is key to lead climbing on sport routes. Racking, placing, and clipping your draws quickly and effectively can take many hours of practice, but here are the basics.
Racking
While some quickdraws have identical carabiners, others feature slightly different biners on each end. If the biners are heterogeneous, the bent and/or wire gate biner is usually the bottom biner (the one you clip your rope to) and the traditional straight gate is the top biner (the one you clip into the bolt).
You should always place (or rack) your quickdraws on your harness with the top biner attached to your gear loop. Beyond this, every climber racks based on personal preference.
It pays to look at your route before you rack. For example, if most of the bolts will be on your left as you climb, you may want 80% of your quickdraws on your left side. Some climbers also prefer to rack with the gates facing in, others (albeit the minority) prefer gates out.

Ultimately, it’s up to you. Whatever allows you to grab and place a draw quickly, expending as little energy as possible, is the correct choice.
Placing
When you pull a quickdraw off your harness and prepare to place, look at the direction in which you’ll be climbing relative to the bolt. This is called your direction of travel.
You want the gates of your quickdraw facing away from your direction of travel. So if the bolt is on your right and you’ll be climbing up and left, clip the draw with the gates facing to the right.
Clipping
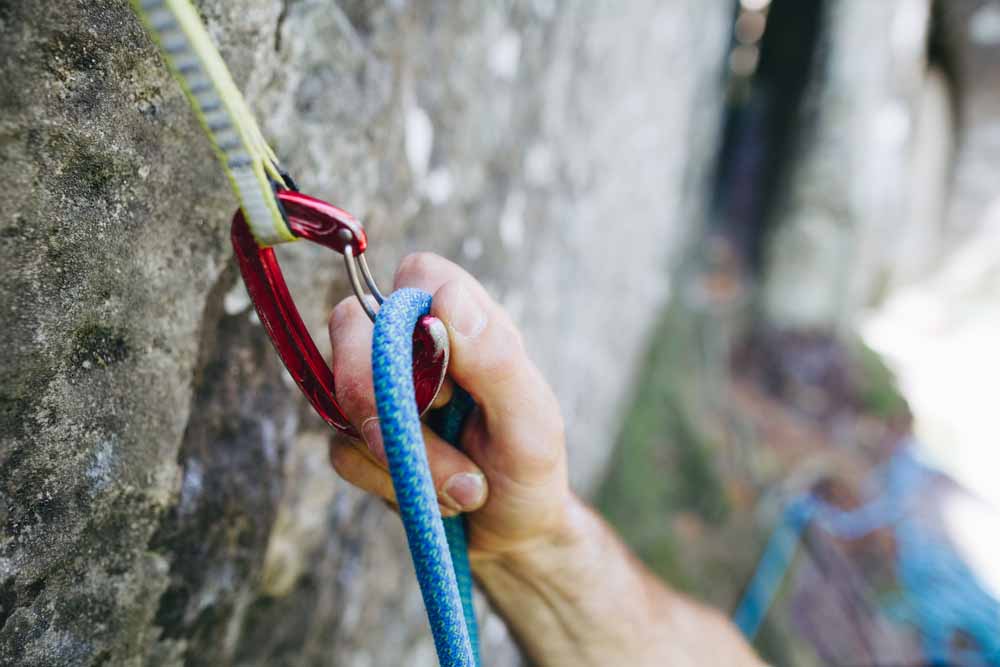
After you clip the top carabiner of a draw into a bolt, you’ll grab your rope and clip it through the bottom carabiner. There are many techniques, but the important thing is that you ALWAYS clip the carabiner with the rope passing from the cliffside to the outside. In other words, you want the rope coming out away from the rock, not towards the rock.
This may sound confusing at first, but it’s pretty easy to identify in practice. Essentially, the rope should be clipped so that if the quickdraw is pulled outwards, perpendicular to the wall, the rope runs cleanly up and down.
Practice proper clipping until it becomes second nature. Doing the reverse (backclipping) can cause the rope to unclip itself from the quickdraw during a fall.
Another thing to be wary of is z-clipping. Z-clipping occurs when the bolts are so closely spaced that you accidentally grab the rope from below your previous draw and clip it to the next draw. As you can imagine, this will lead to some pretty insane rope tension (also called drag), and longer-than-expected falls, but it’s pretty easy to catch and prevent.
The Rope and Your Body
As you climb, your body positioning relative to your rope is important. The most crucial error here is regarding leg placement.
If you place your leg or foot behind the rope while climbing, during a fall the rope will flip you upside down. This can cause you to crack your head, break a limb, or worse. So always keep the rope in front of you. Sometimes stepping behind the rope momentarily is hard to avoid because of a tricky sequence of moves, but correct it as soon as possible to prevent a chaotic fall.
By the same principle, avoid having the rope wrapped around your arm, over your shoulder, or anything else. The rope should always descend straight down in front of you from your harness, unobstructed.
Taking Falls
Unlike top roping, lead climbing requires you to take falls… sometimes big ones. Falling is an art that needs to be practiced, but the following tips will help you fall safely.
- Communicate. Let your belayer know you think you’re going to fall so they can take slack and/or lock off. “Falling!” is a common heads-up.
- Watch your rope. Keep it between you and the wall at all times. Make sure it’s not running behind your leg, foot, or even toe. Make sure it’s not wrapped around your arm, behind your back, or anywhere else.
- Relax. Tensing up during a fall makes the catch more jarring. Stay loose and relaxed. Keep your arms at chest level. Keep your elbows and knees slightly bent.
- Don’t push off. It can be tempting to push off the wall as you fall, jumping out to clear air, but it will ultimately cause you to swing back into the wall, pendulum-style. The only exception to this rule is if there’s an obstruction below you that you need to avoid.
- Feet first. Aim for a soft, bouncy landing with only your feet, instead of trying to catch the wall with both your hands and feet. Keep your hands back, but at the ready to protect your face if you slam in.
Belaying for Lead Climbing
Belaying a lead climber is the reverse of belaying a top rope climber. Instead of taking in slack as the climber ascends, you’re giving out slack.
Belaying is crucial to your climber’s safety, and—like climbing and falling—it’s not something you can master simply by reading an article. You’ll need to become comfortable giving and taking slack while maintaining control of the rope, keeping your brake hand positioned to arrest a fall.
But the most important quality of any lead belayer is…
Slack Maintenance
In addition to being ready to lock off and arrest a fall at all times, lead belaying is all about maintaining the proper amount of slack in your line. Too little slack and your climber can’t even move upwards. Too much slack and you risk your climber taking a long, sketchy fall, potentially hitting a ledge or even the ground.
Keeping adequate slack in the line is difficult, and every climber has their own preferences. Newbie climbers often like a pretty close belay. Experienced climbers, comfortable with falling, usually prefer lots of slack. This allows them to move and clip without any delay.
When a climber is preparing to clip, give a bit of extra slack in advance so they can clip quickly, without having to yard on the rope. When a climber is preparing to fall, take out extra slack to make their fall as short as possible.