Climbing as a sport is in its relative infancy. When we compare it to other activities such as gymnastics or weight lifting, climbing lacks the large amount of academic literature that helps establish optimal ways to train to achieve certain goals.
A structured approach to climbing training has only really been developed over the past 30 years, with specific tools being developed to help climbers target key areas.
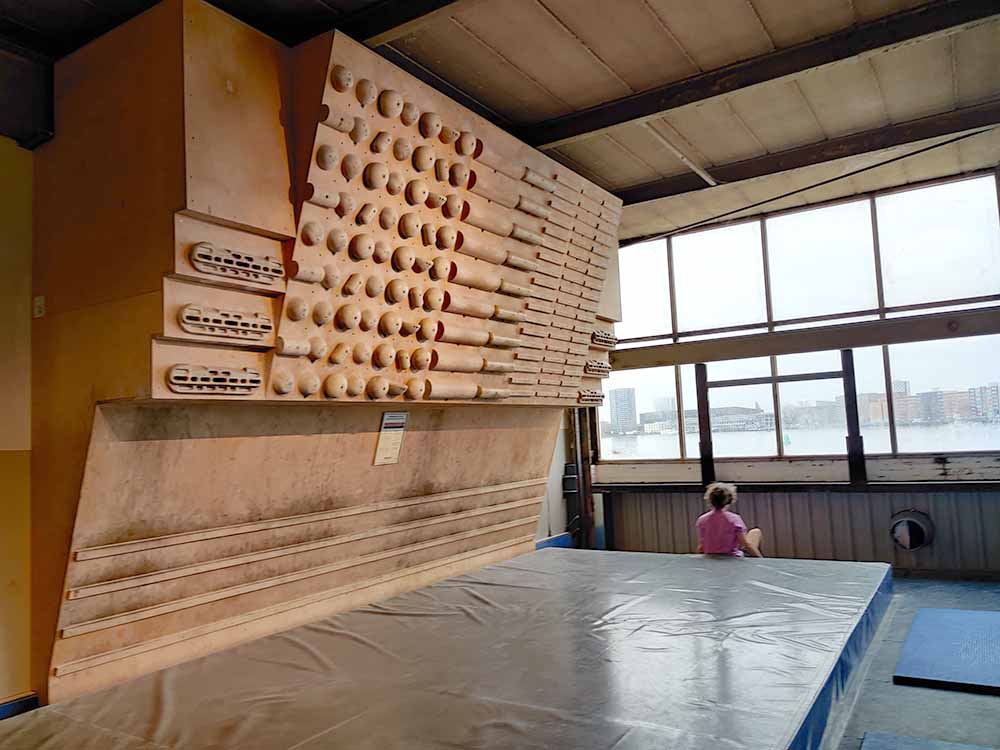
A hangboard, alternatively called a fingerboard, is one of these key tools. In this blog post we take a look at some of the key considerations of using a hangboard for training finger strength and how you can integrate this tool into your training to break through plateaus and get stronger fingers.
What is Hangboard Training?
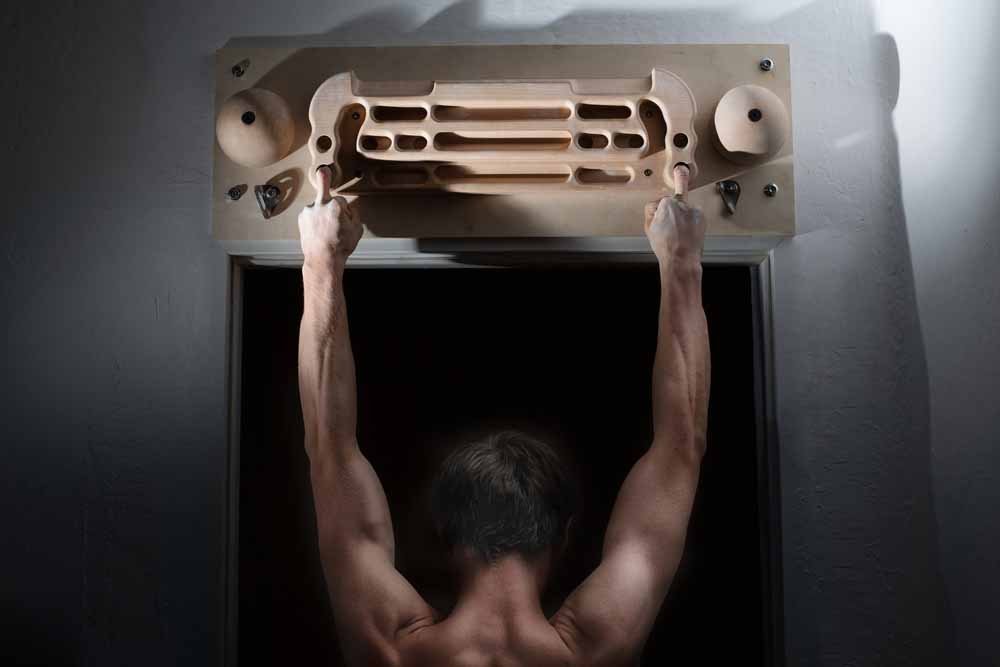
Using a hangboard is a simple and specific way to train finger strength in an isolated manner. The climber literally hangs from his fingers using one of multiple grip positions for a certain amount of time and a desired rep count, on the hangboard.
Hang time, hold type and number of sets are changed depending on the desired result and there are lots of different ways to do this through different hangboard exercises.
When done correctly and with good form, the stimuli or overload is placed uniquely through the fingers, forearm tendons and muscles with no way to compensate with other muscles, ultimately producing stronger fingers.
Of all the ways to improve finger strength, hangboard training has become established as the go to training tool, allowing climbers to break through plateaus, target weaknesses in their climbing and take things to the next level.
Why Use A Hangboard?

While just climbing is great fun and for a significant amount of time climbing more is the best way to progress. After a while though you may have certain goals: consistently boulder V6, send that project you failed on a recent trips, and just climbing is no longer helping you get any closer.
There are different approaches to try and reach those goals. Using an approach with consistent exercises, where progress can be quantitatively measured and progress tracked provides a great framework to achieve this.
By carefully monitoring performance of the same exercises and applying additional stimuli if no progress is being made, then adaptation can be forced in a more controlled manner than through simply climbing.
Through whichever approach chosen, training will therefore will require:
-
Overload. For muscles to develop they need to be stressed to a certain threshold to force adaptation.
-
Repetition. Exercises or overload must be repeated over a certain time frame in order to have measurable progress.
-
Recovery. It’s after training and during recovery that protein synthesis happens leading to getting stronger. A lack of enough rest and recovery leads to injury.
Ultimately progress is made through consistent training, making small gains over time and not getting injured.
What to Train?
Climbing ability is made up of the following factors:
- Strength
- Power
- Endurance
- Power-endurance
Hangboard for climbing predominantly targets forearm strength and power-endurance, depending on the exercise type used.
Although it can also be used to work endurance, a hangboard workout is not the go-to for this. Endurance is usually done performing laps of routes, waterfalls or linking up multiple boulder problems. This is performed at a very low intensity (40%). Pure power can be worked using campus board exercises such as ladders and bumps.
Structuring your Hangboard Training

When working towards these goals you should try and plan the types of sessions and the type of training you’ll be doing in certain training blocks. This is generally called structured training or periodization.
This type of training plan, will be specific to the individual and the type of structured training being performed but you should know ahead of time what you’ll be doing within a certain climbing or training session.
Hangboard Training Frequency
When it comes to working the fingers, little and often seems to provide a good baseline and continuity of strength. Having a relatively short fingerboarding session once a week, regardless of what other training you’re performing, can be a great way of doing this.
This can of course be increased depending on your goals. You can dedicate a training block of 4-6 weeks just to hangboard for climbing to see larger gains, but then maintaining a weekly session will avoid completely losing those.
In the long term performing regular sessions over the entire year will provide better results than a dedicated training block followed by nothing more.
On top of that tendons don’t like change and require months and years to build up strength (in comparison to muscles which adapt quickly). By regularly working them this will provide slow and steady progress, building up tissue strength.
When performing high intensity strength training such as a hangboard workout, you should also be as fresh as possible. This should therefore be done at the beginning of the session, not at the end in order to “finish yourself off”, as you may often see people doing.
Warming Up
A good warm up is important in any workout and even more so with high intensity targeted training such as with a hangboard session. Your warm up should be made up of three parts:
-
Increasing your body temperature through cardio based exercises.
-
Dynamic stretching to limber up which can also include foam rolling.
-
Easy climbing if you’re at the climbing gym or easy strength exercises such as pull ups.
The aim here is to prepare your body for the hard work ahead. Jumping jacks are great examples of exercises to raise the heart rate, wrist circles can help warm up your wrists plus shoulder shrugs using a pull up bar can help activate the shoulder blades.
When Should You Start Hangboard for Climbing?

There are varying opinions on this. You often hear from advanced climbers that you should not start using a hangboard until you’ve reached a certain grade, have been climbing for a certain amount of time, or have some level of fitness/strength.
The idea behind this is effectively that over the first few years when you start climbing, there is so much to learn. Progress can readily be made by simply climbing a lot. Initially, honing in technique should be a priority as opposed to building strength.
Over these first few years, improved technique and confidence building in say sport climbing will provide more progress than simply stronger fingers.
That being said, there is no specific reason a relatively new climber can’t incorporate some light hangboard for climbing into his or her training in order to start building a solid foundation of finger strength. The key is to make this light and progressive in order to avoid finger injuries.
Climbers who have been at it for at least a few years or have hit plateaus will definitely benefit from the hangboard training approach to building finger strength.
Different Grip Types
When starting hangboard training you’ll need to decide which grip types to train.
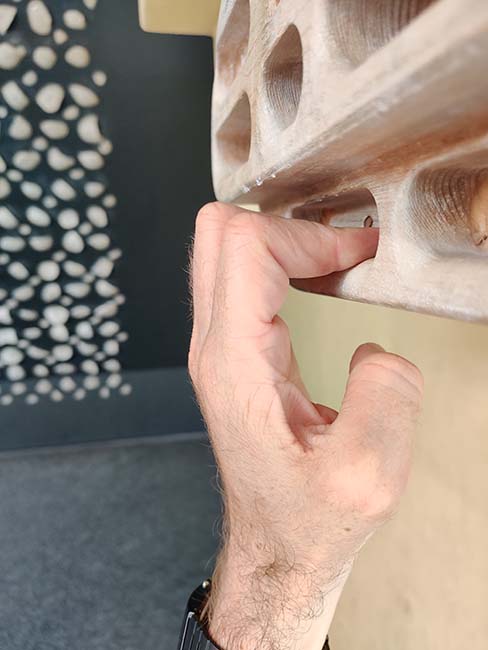
Open Handed Grip Position

With the open-hand grip the index and little fingers are generally straight with a slight bend in the PIP joints of the middle and ring finger.
The open hand position also has distinct advantages over other grip types for building grip strength. Firstly, it is one of the least stressful on the finger joints and tendons. If you have a tendency to get pulley or other finger injuries, this will place less strain on them.
Furthermore, although it feels less powerful than, say, crimping, it can be trained to become your strongest grip position on all but the smallest crimp and in-cut holds. This grip is most effective on deep, rounded or sloping holds, and especially when pulling on pockets.
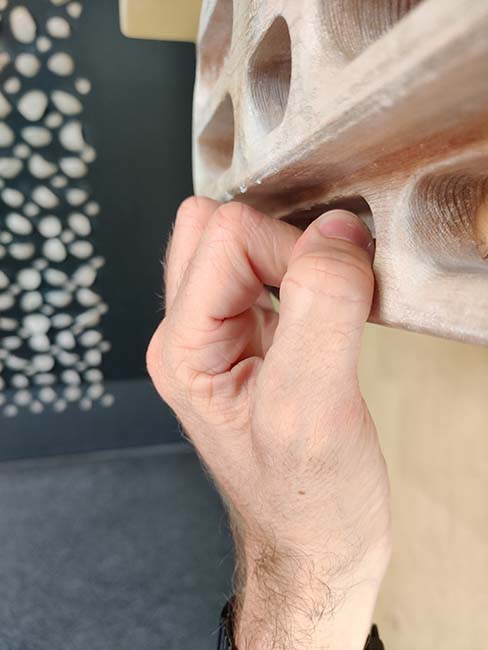
Half Crimp Grip Position
The half-crimp also uses all 4 main fingers and is a variation of the full crimp, although less dangerous. There is 90 degree flexion in the PIP joint and the thumb generally squeezes from the side or below.
This reduces finger joint and tendon stress, softening the aggressive angles on the PIP and DIP joints, but at the expense of a slightly less secure feel.
This is one of the most common grips used.
Full Crimp Grip Position
Essentially the same as the half crimp with the difference that the thumb comes up and presses down on the index finger giving extra power.
The full crimp grip is generally favoured by many climbers without realising because it feels like the most secure and where you have the most grip strength. This is thanks to extra power from the thumb pressing down on the index finger.
The grip excels on small, square-cut edges, shallow flakes, and any hold that possesses a small in-cut edge.
Full crimping too much can be more risky for the fingers. It arcs the DIP joints into a more stressful and acute angle. It is the most stressful of all grips on the tendons and joints. Chronically overusing this grip can lead to various tendon injuries in the fingers and elbows, especially among individuals who frequently chicken wing their elbows.
It’s generally advised to hold off training the full crimp with hangboard training until you’re extremely experienced and climbing at an elite level, or even categorically avoid it given the risk of finger injury. Also, strength developed from half-crimping will transfer well given the similarity in grip types.
Different Hangboard Hold Types

Most modern hangboards come with a variety of different holds which allow you to work different grip positions on different hold types:
- Large/medium/small edges
- 3 finger pockets
- 2 finger pockets
- Monos
- Slopers
All of these can be used to train different holds with a combination of different grip types. For example:
- 4 finger half crimp/open hand using a large/medium/small edge
- Back-2 fingers, open-hand grip
- Front-2 fingers, half crimp
When getting started it’s best to stick to 4 finger grips whilst you get used to the strains of hangboard training to establish some basic strength. This will training all your fingers. After that you can use different combinations depending on our goals, project or weaknesses.
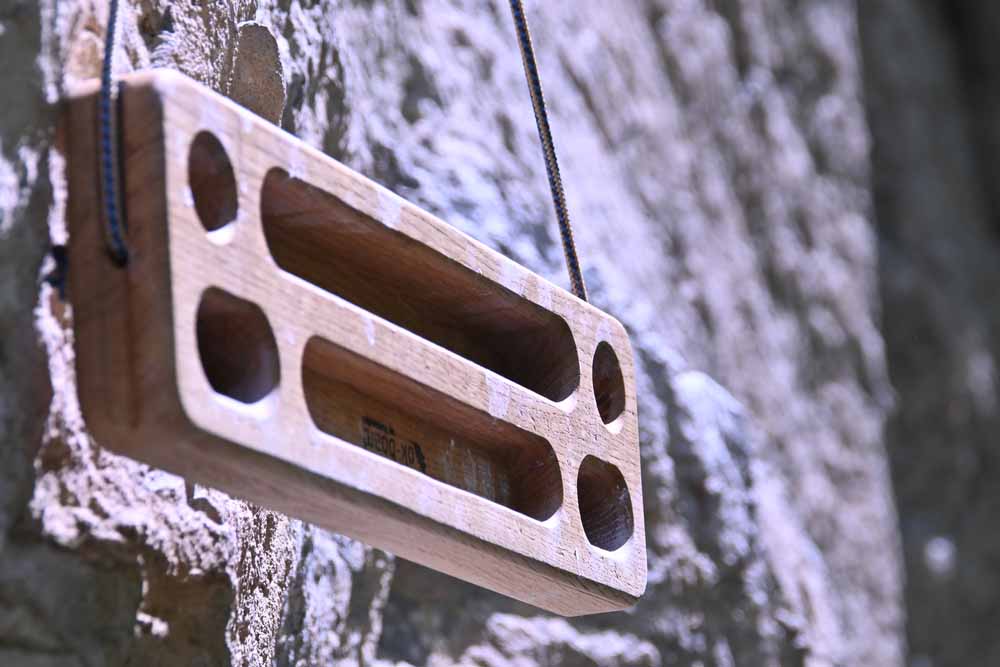
You also want to be training on holds that aren’t too sharp and are comfy in order to not destroy your skin. Wooden hangboards for climbing have a distinct advantage here, especially those with a nice radius. They’re soft on the skin and also absorb moisture.
You equally want to use edges that sit within the first or second finger pad. This generally corresponds to 10, 15 or 20mm edges. An edge that sits within a finger joint will become extremely uncomfortable and destroy your skin.
Hangboard Exercises

Whilst there is no “best” way to perform all hangboard exercises, there are two standout exercise types that get the most attention.
These are:
- Repeaters
- Max hangs
The way that these are performed, varying hold time, grip type, reps, sets and rest time are all ways to tailor the exercises to make them more or less challenging or target different factors such as max strength or strength-endurance.
Repeaters
This exercise is the gold standard for power-endurance based strength training, rather than pure maximum strength like max hangs are. This hangboard exercise is preferable for beginners given that it places less strain on the upper body in comparison to others.
You basically pick a grip, hold for a certain amount of seconds then rest for a certain amount of seconds and repeat this for a certain number of reps.
This makes one set. You then rest between sets. The last reps of each set should be very difficult with you struggling to hold on, maintaining good form.
A typical example of repeaters, is as follows:
- Hold 7s, rest 10s, performed 6 times.
- Rest 3 minutes between sets. Up to 3 sets.
There are many different repeater protocols or variations to the above in general. One of the aspects that often changes is the rest time between each rep.
This hangboard exercise can be changed in the following way for beginners:
-
Start with longer rests between each rep, such as 30 seconds between each 7 second hold and then a 3-5 minute rest between sets.
-
The rest between holds can then be progressively reduced to 10 or 5 seconds between each hold and 3 minutes between sets once you’ve advanced.
Max Hangs
The go-to hangboard exercise for max strength. Here larger and more comfortable holds are used but weight is often added to create a high intensity for max strength overload. Standard edges used for this are 14-20mm or slightly less than one finger-pad depth.
Here it is very simple. Perform one hold of between 5-10 seconds, this is one set. Then rest for at 3 minutes and perform another hold. Given the high intensity you only need to perform 3-5 holds.
Given the short duration of each hold weight often needs to be added, although when starting off you should always increase the weight extremely progressively over time.
Given the intense nature of the max hang and additional load placed on the upper body by more weight, you must make sure to be fully warmed up before performing these. Perform them at the beginning of your session and maintain pristine form with each hang. If your form starts to deteriorate then call it a day, rest and listen to your body.
For this reason max hangs are considered a more advanced hangboard exercise regardless of the grip position and should be attempted once you’ve been through a few cycles of repeaters or have a solid foundation of finger and scapula strength.
Hangboard Proper Form
Many people seem to have varying opinions about the proper form for hangboarding, even amongst experts.
The general guidelines are that you shouldn’t just simply straight-arm dead-hang like a sack of potatoes from the fingerboard. This puts undue strain through the arms on to the elbows and shoulders and wont do any good, most probably leading to some type of upper body strain.
Instead, you should always maintain:
- Slightly bent elbows.
- Muscular tension in the upper-back.
- Keep your scapula engaged, without shrugging your shoulders close to your ears.
Controlling the Difficulty

Regardless of your climbing experience, to get the intensity just right and avoid the risk of injury you may need to make certain exercises more or less difficult. This needs to be done in a carefully and controlled manner so that your forearms are stimulated in exactly the right way.
There are effectively two ways to do this: