Knots are an essential part of rock climbing. For example, they are used to secure yourself to the climbing rope, build anchor systems, and join two ropes for rappelling.
A good knot can save your life, while a bad knot can lead to disaster. Therefore, learning how to tie knots for climbing is non-negotiable.
Below you will find a list of knots that I use almost every time I go climbing. I will include ideal scenarios when certain knots can be deployed and step-by-step directions for how to tie them.
Essential Knots for Rock Climbing
There are many different knots that are used in rock climbing, but some of the most important ones include the double figure-eight knot, bowline, the clove hitch, and the double fisherman’s knot.
As an important part of getting started in climbing, it’s important to learn how to tie these knots properly and to practice them regularly.
Double Figure Eight Follow-Through
The double figure eight follow-through knot, also known as a “figure eight” knot or “eight knot,” is the quintessential rock climbing knot.
When properly tied and dressed, the figure eight knot is super strong, relatively easy to tie, and simple to inspect visually. For those reasons, it’s the primary knot you use to tie your climbing rope into your harness, especially in indoor climbing gyms.
One fallback of the figure eight knot is that it does tend to become difficult to untie or “weld” after repeated falls.
The double figure eight follow-through can also be deployed to wrap trees or boulders when creating a top rope anchor. Although in this context, it’s typically more common to use a bowline knot, which I will talk about next.
Step-by-Step Instructions for the Double Figure Eight Follow-Through Knot
- Start by tying a loose figure eight knot.
- Thread the tail through or around your attachment point.
- Follow the original figure eight around the entire knot.
- Exit the know by the standing end to completely double the original figure eight knot.
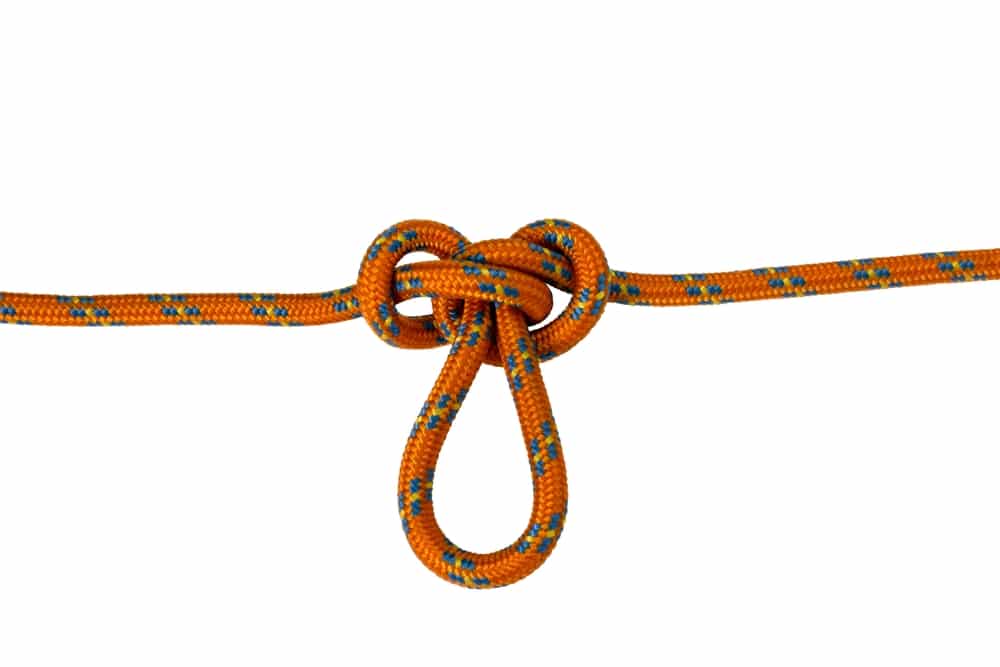
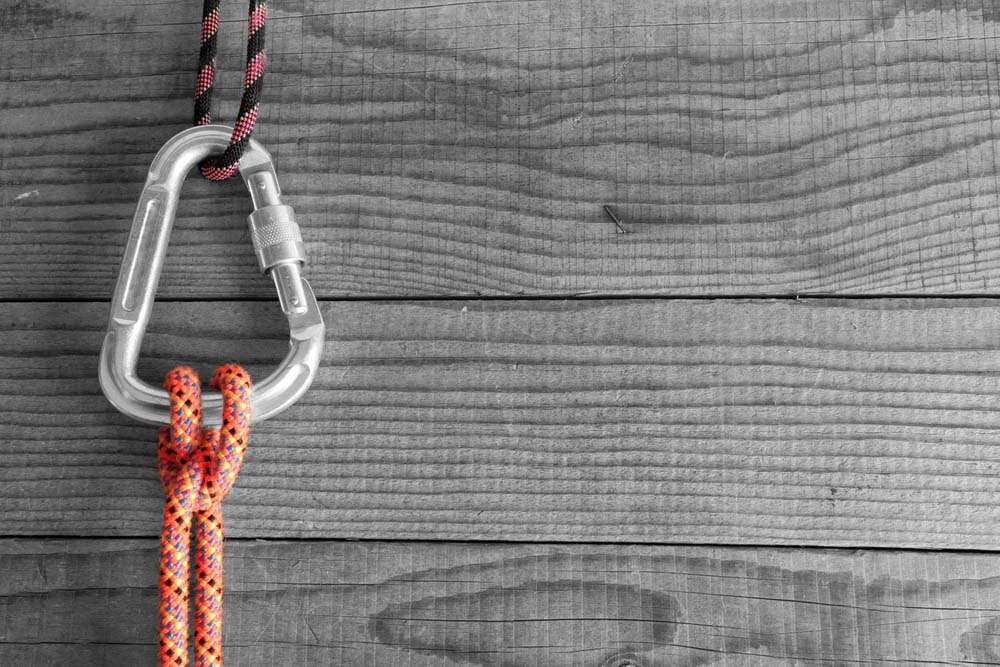
A figure eight knot can also be tight on a bight of rope instead of at the end. A figure eight on a bight is the go-to knot when I want to create a master point in an anchor system, secure a climber into the end of the rope using a locking carabiner instead of by tying them in, or to secure myself into the end of the rope with a locker after I’ve cleaned and threaded a fixed anchor and need my belayer to lower me.
Bowline Knot
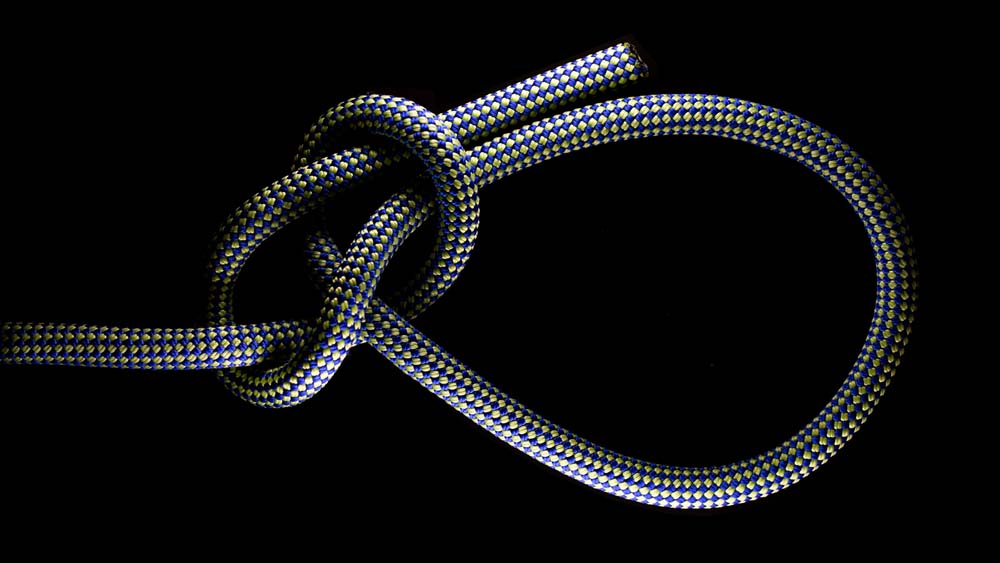
Originally, the bowline knot came from boating when sailors needed to hold the weather leech of a sail forward to prevent it from being taken aback. Now, the bowline gets used a lot in rock climbing.
That’s because the bowline knot makes a secure loop at the end of a rope. Therefore, you can use it to wrap trees or boulders when creating a top rope anchor.
You can also use the bowline knot as a tie-in knot with your climbing rope and harness. The bowline is especially ideal when projecting a route because it remains easy to untie even after repeated falls.
However, most climbing gyms don’t accept the bowline as your primary tie-in knot. That’s because it’s slightly more convoluted to tie and harder to visually inspect.
When using a bowline knot in climbing, it’s essential to finish the knot with an additional safety knot. Typically, this is done with an overhand or fisherman’s knot on the adjoining loop or the standing end of the rope.
Step-by-Step Instructions for the Bowline Knot
- Make a small loop while leaving enough extra tail to wrap the rope around your attachment point.
- Pass the end of the rope through the original loop as if creating an overhand knot.
- Continue around the standing end of the rope and then back through the small loop.
- Finish the bowline with a safety knot.
Overhand Knot
The overhand knot is one of the simplest and most common knots you can deploy while rock climbing. It’s the ideal knot for various scenarios, such as creating a rappel extension, making a stopper knot, and joining the ends of two ropes to rig a double-rope rappel.
When applied to join two ropes in a rappelling context, the tails of the flat overhand knot need to be at least 18 to 24 inches long. For rappelling, some climbers will tie an additional overhand knot to be extra safe, although this creates more bulk.
Step-by-Step Instructions for the Overhand Knot
- Form a loop.
- Pass the end through the loop.
- Tighten the knot.
Step-by-Step Instructions for the Flat Overhand Knot (joining two ropes)
- Start with enough rope to allow for long tails.
- Using both ropes, make a loop.
- Pass both ends of the two ropes through the loop.
- Tighten and dress the knot by pulling on the four strands individually.

An overhand knot can also be tight on a bight of rope instead of at the end. An overhand on a bight is the go-to knot for a variety of scenarios. For example, I deploy an overhand on a bight when I want to tie off my grigri while belaying, and I need to go hands-free, tie in a climber into the middle of the rope, or when creating a master point in my anchor system.
Double Fisherman’s Knot
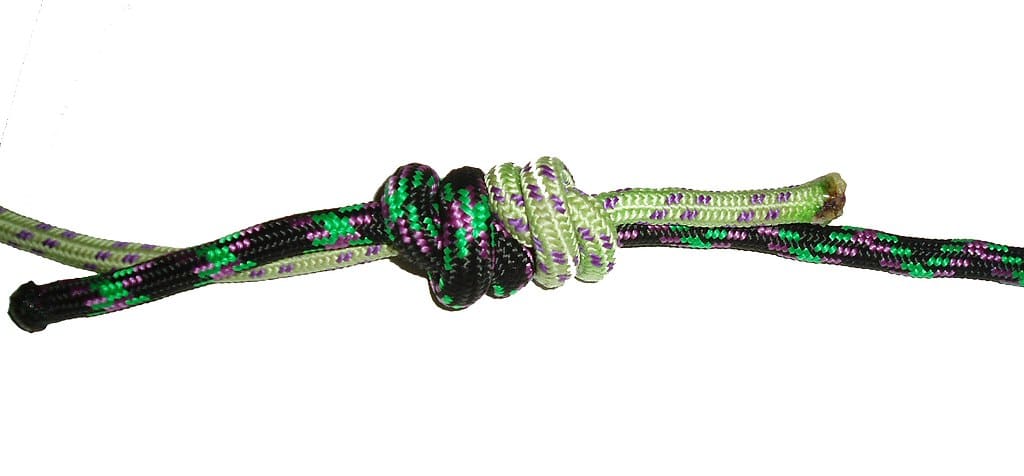
The double fisherman’s knot, also known as the grapevine bend, is one way you can join two ends of the rope. The boule fisherman’s knot is strong, reliable, and compact.
This makes a good option for joining two climbing ropes for a full-length rappel, creating a prusik loop with a cord, or tying off the ends of your cordelette. ‘
When applied to join two ropes in a rappelling context, the tails of the knot need to be six to 12 inches in length.
The double fisherman’s knot is super effective. However, sometimes that results in the knot becoming welded and difficult to untie.
Step-by-Step Instructions for the Double Fisherman’s Knot
- Overlap the two ends of the rope.
- Wrap one end around both ropes with two full turns.
- Then pass the end back through the two turns and pull tight.
- Next, pass the other end of the rope two full turns around both ropes.
- Pass the end back through the turns and pull tight.
- Pull on both ropes to righten the knots against one another.
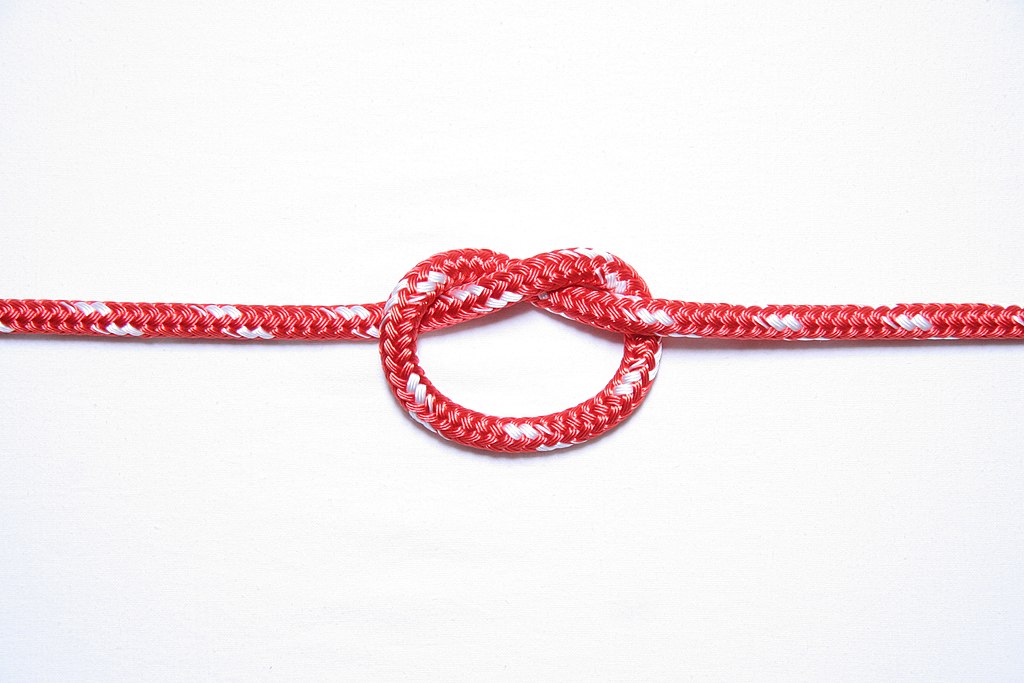
Alpine Butterfly Knot
The alpine butterfly knot creates a secure loop in the middle of a piece of rope. It’s perfect when you need to tie in a climber in the middle of a rope, for example, in an end-roping scenario. Alpine butterfly knots are also convenient when creating hand lines to assist climbers through tricky scrambles in third or fourth-class terrain.
Step-by-Step Instructions for Alpine Butterfly Knot
- Wrap the rope around your hand two times (wrapping towards your fingers).
- At the end of turn on, position the rope so its close to your fingertips.
- Complete the second turn back near your thumb.
- Pick up the turn you positioned near your fingertips.
- Wrap it around the other two turns.
- Slide the know of your hand and tighten.
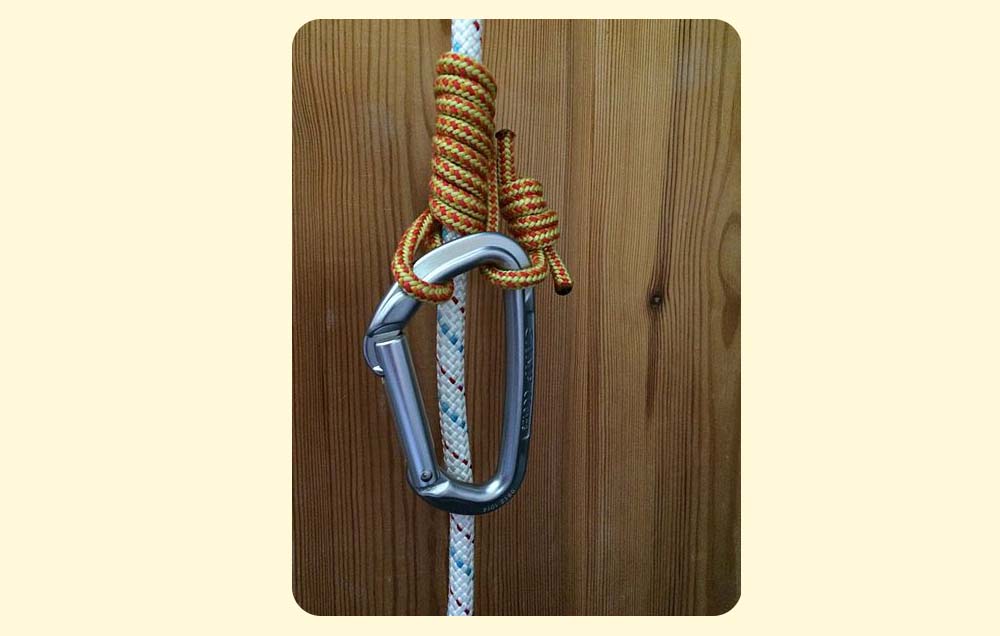
Clove Hitch
The clove hitch is a supper useful tool for various scenarios in rock climbing. The most common are tethering yourself to the anchor using the climbing rope, building anchos, attaching objects to the middle of the rope, or creating a carabiner block for a single-rope rappel.
The clove hitch is ideal because it’s very quick to create and easy to use. The clove hitch is also nice because it can be adjusted (lengthened or shortened) without untying the knot. This is particularly useful when adjusting the lengths of the legs in an anchor system or adjusting the length of your tether after you reach the top of a pitch and clove hitch into the anchor system.
Step-by-Step Instructions for the Clove Hitch
- Make a loop in the rope.
- Make a second loop the same way (both loops should be identical).
- Cross the loops one above the over to make a knot.
- Clip the center of the knot with a carabiner and tighten.
Essential Friction Hitches for Rock Climbing
Thus far, I’ve talked about knots your tie with a length of climbing rope or something similar like a loop of cord or even sewn slings. However, I want also to discuss quickly three friction hitches that are not knots but are as equally important.
Friction hitches are knots made with a secondary piece of material, oftentimes a skinny, small-diameter loop of cord, that you tie around the larger primary climbing rope. They are not full-strength knots and should never be trusted with your life. However, they are effective tools for certain rock climbing applications.
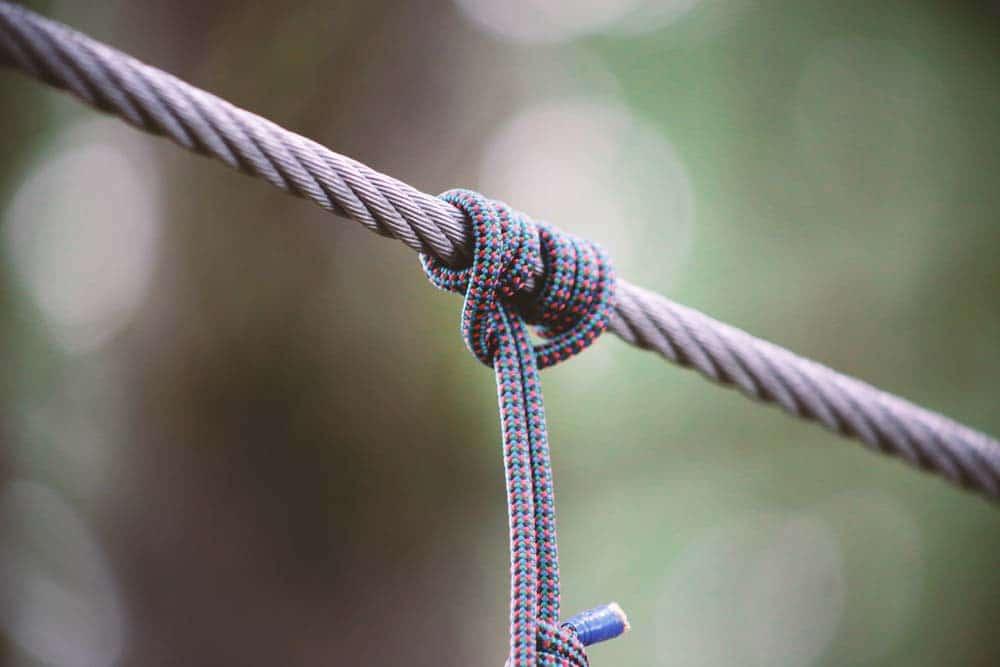
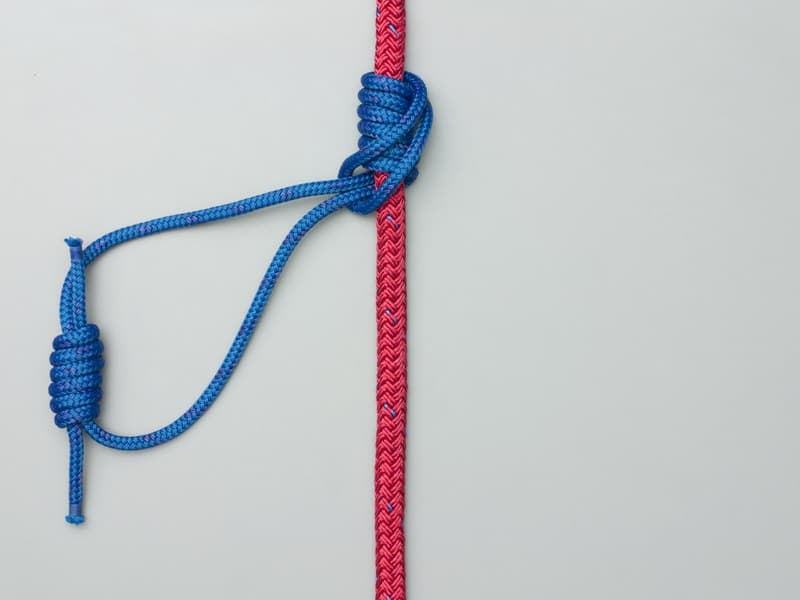
Prusik
The prusik knot was originally developed an popularized by Austrian mountaineer Karl Prusik in 1931. At the time, the primary usage of the prusik knot was to ascend fixed ropes on aid climbs. However, nowadays, prusiks are used less for ascending ropes and more for hauling climbers in rescue scenarios or backing up rappels.
A prusik knot is a separate piece of small-diameter cord that you fasten onto a larger-diameter climbing rope. The friction from the prusik knot grips the rope and locks it in place when under load. Then, when unloaded, the prusik can be released and smoothly slid along the climbing rope.
Step-by-Step Instructions for the Prusik
- Pass a loop of small-diameter cord behind the climbing rope.
- Feed one end of the prusik loop through the other three times (maybe four times to create more friction).
- Pull the hitch tight and dress the hitch so all the strands are parallel and not twisted.
- Check that the hitch is functioning.
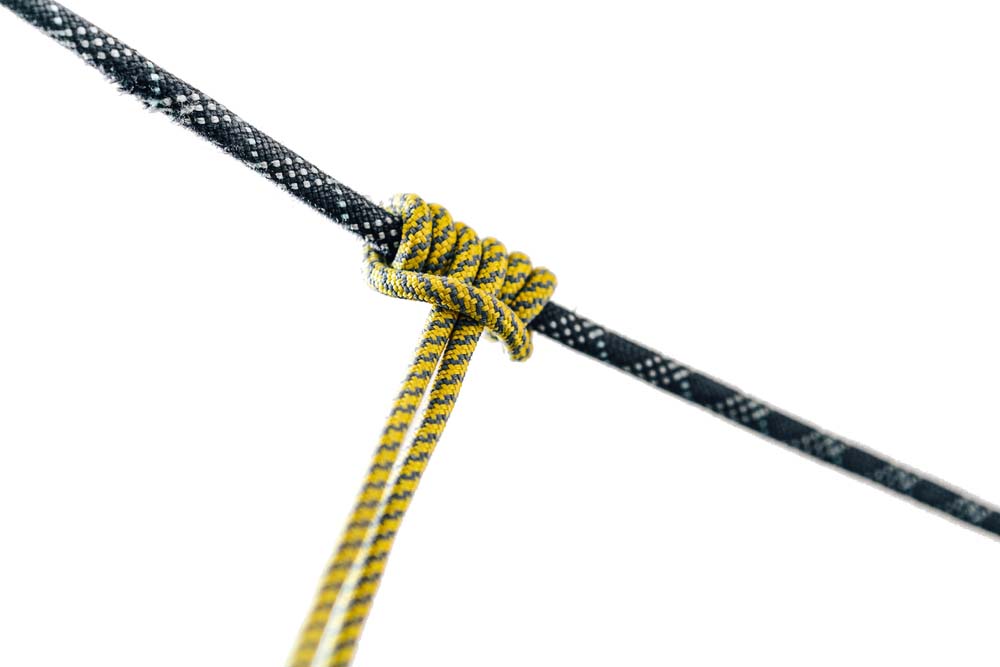
Autoblock
The autoblock, also known as the French prusik, was invented by Serge Machard in 1961. Similar to the prusik, the autoblock relies on friction to grip the rope. Therefore, it can be used to ascend ropes and haul climbers in a rescue scenario. But in my opinion, the autoblock is ideal for backing up rappels.
Step-by-Step Instructions for the Autoblock
- Pass a loop of small-diameter cord behind the climbing rope.
- Wrap the climbing rope three times (maybe four times if you need more friction).
- Clip the two loops of the autoblock with a carabiner.
- Pull the hitch tight and dress the hitch so all the strands are parallel and not twisted.
- Check that the hitch is functioning.
Klemheist
The klemheist, also known as the Machard knot, is a derivative of the prusik knot. It is a slip-and-grip hitch that can be used to ascend a climbing rope or haul a climber. However, unlike the prusik and the autoblock, the klemheist can only be loaded in one direction.
Step-by-Step Instructions for Klemhiest
- Pass a loop of small-diameter cord behind the climbing rope.
- Wrap the climbing rope three times (maybe four times if you need more friction) in the opposite direction of the expected load.
- Pass the rest of the cord up through the loop and pull down in the direction of the expected load.
- Pull the hitch tight and dress the hitch so all the strands are parallel and not twisted.
- Check that the hitch is functioning.
Safety Considerations for Knots While Rock Climbing
- Practice climbing knots regularly. You can practice with both hands, with your eyes closed, and with different diameter materials.
- Create a habit of inspecting knots every time. Always double-check, especially before leaving the ground.
- Understand which knots need to be “finished” or “backed up” and which ones don’t. For example, the double figure eight follow-through does not need a safety knot, but the bowline does.
- Always remember to leave an adequate tail when joining two ropes for a rappel. Proper length tails prevent the system from failing if the knot slips under excessive load.
Final Thoughts About How to Tie Knots for Climbing
Knots are an essential part of rock climbing safety. By learning how to tie and use them properly, you can help to ensure your own safety and the safety of your climbing partners.
If you are just getting started out climbing, I recommend mastering these knots on the ground before deploying them in a real climbing scenario with live loads.
Remember– “a not neat knot is a knot not needed.” So, take your time, establish good habits, and always remember to double-check.